PDLC preparation, installation and power supply
How is PDLC smart film prepared for installation, how is it mounted on glass and connected to power? How do we control smart film?
Wiring diagram
To make the smart film system easier to explain, let’s first look at the wiring diagram. The smart film system consists of a PDLC power supply (transformer), a controller and the PDLC film itself. The power supply converts standard 220 V mains voltage into the appropriate voltage for the PDLC film, while the controller enables simple switching of the system on and off.
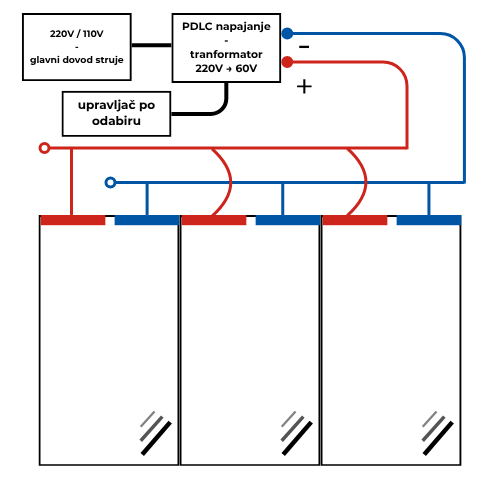
One suitable PDLC power supply can, depending on its power rating, be connected to one or more glass surfaces. Film connected to the same system can be switched on at the same time, while with the right configuration separate controllers can also be used for individual surfaces.
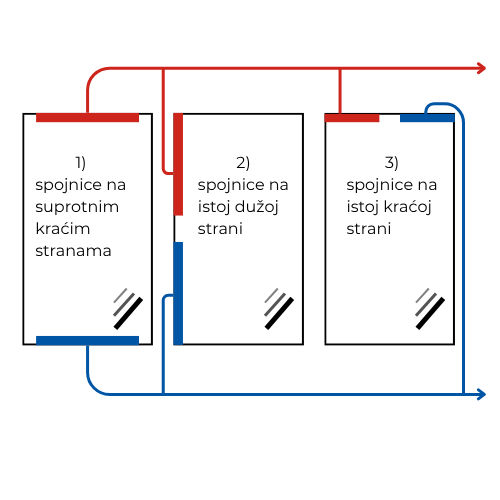
This diagram shows the basic way of connecting smart film to the power supply, but the actual installation and how the busbars are prepared can always be adapted to the location where the smart film will be installed.
Busbars
Smart film busbars are the main contact between the PDLC layer (the one with the crystals) and the electrical current. Two poles are always prepared on opposite faces of the smart film. Which side is positive and which is negative does not really matter — what matters is that a continuous current flows through the smart film.
Here is how we prepare the busbars in a few steps:
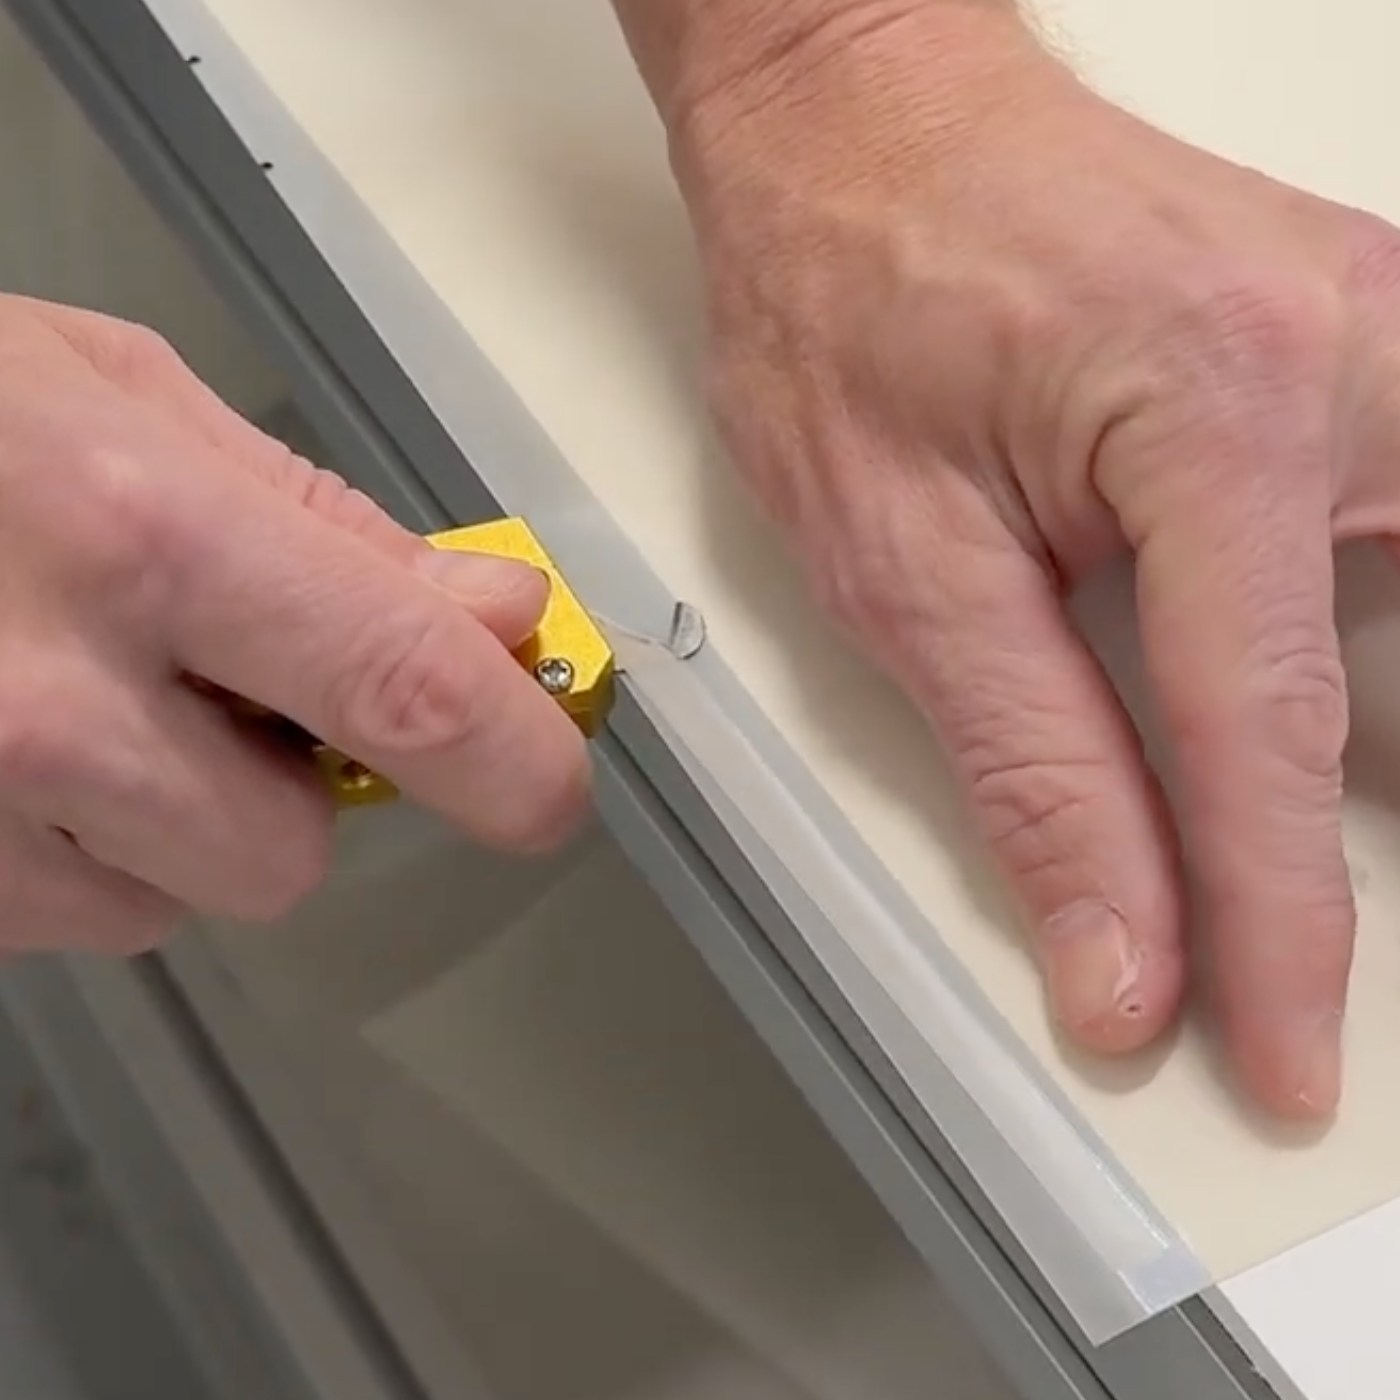
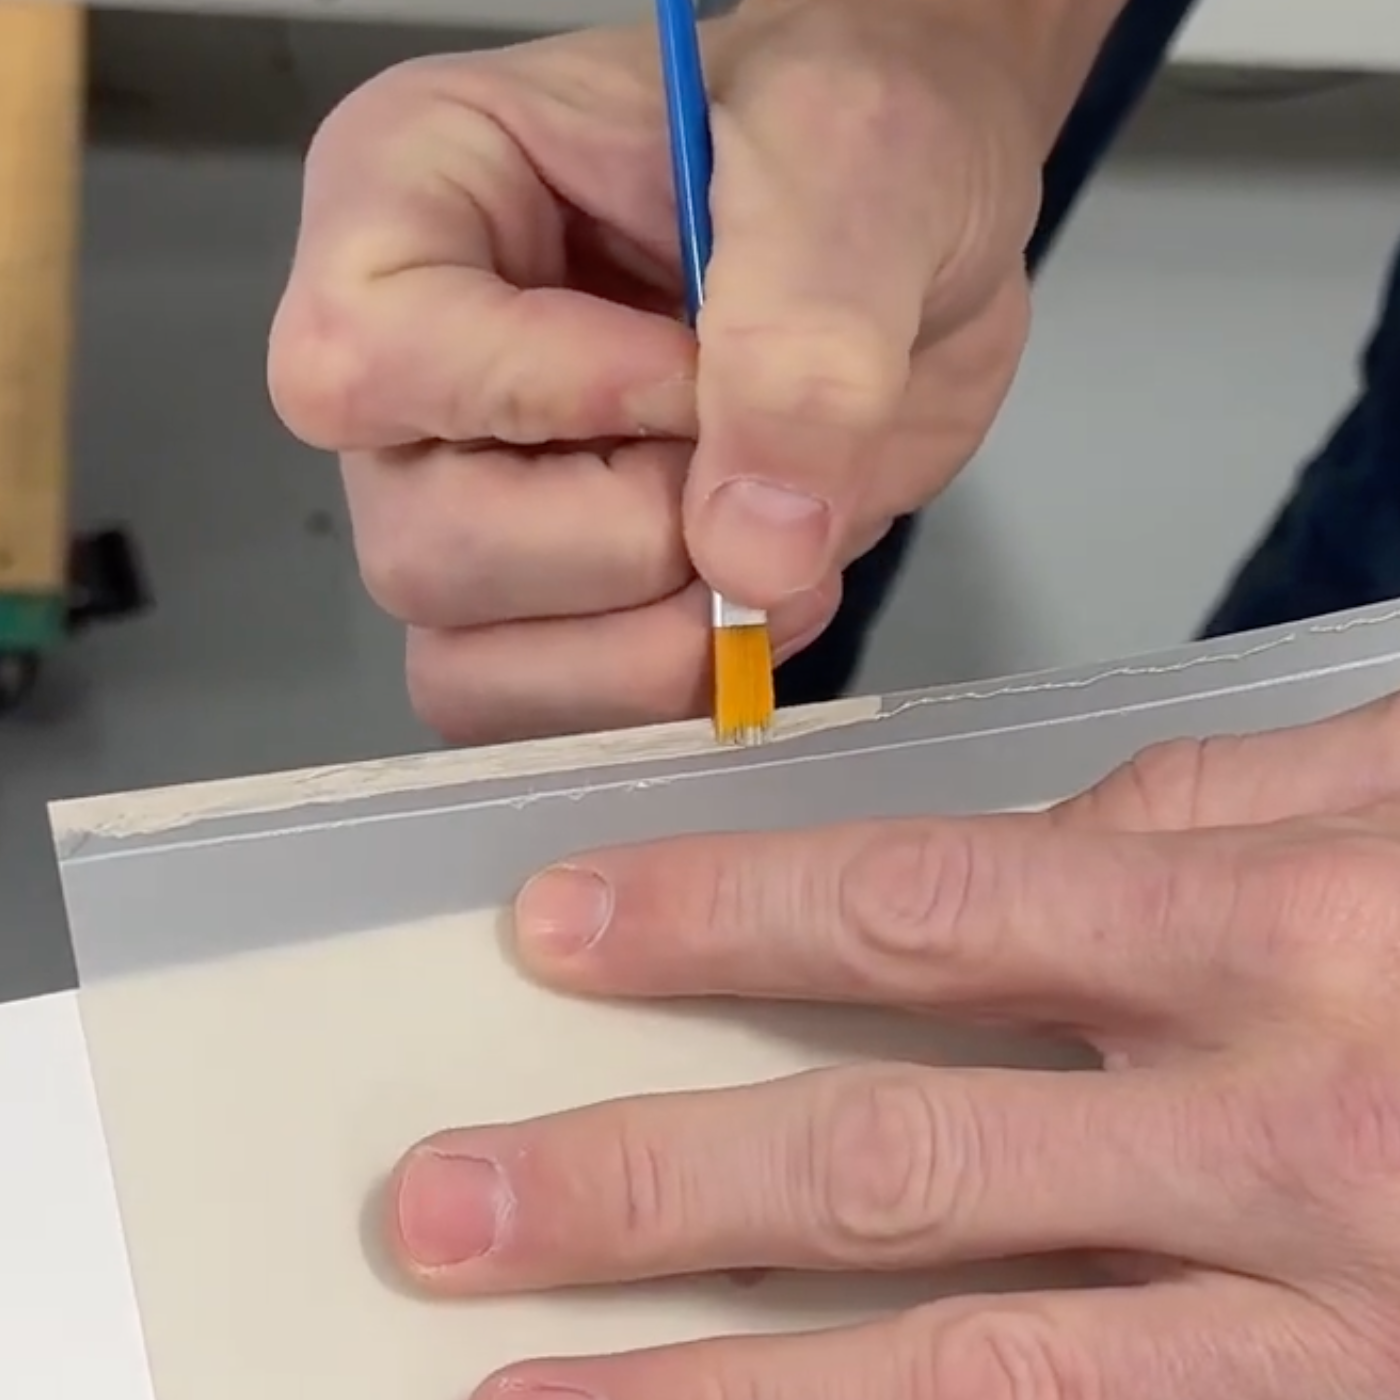
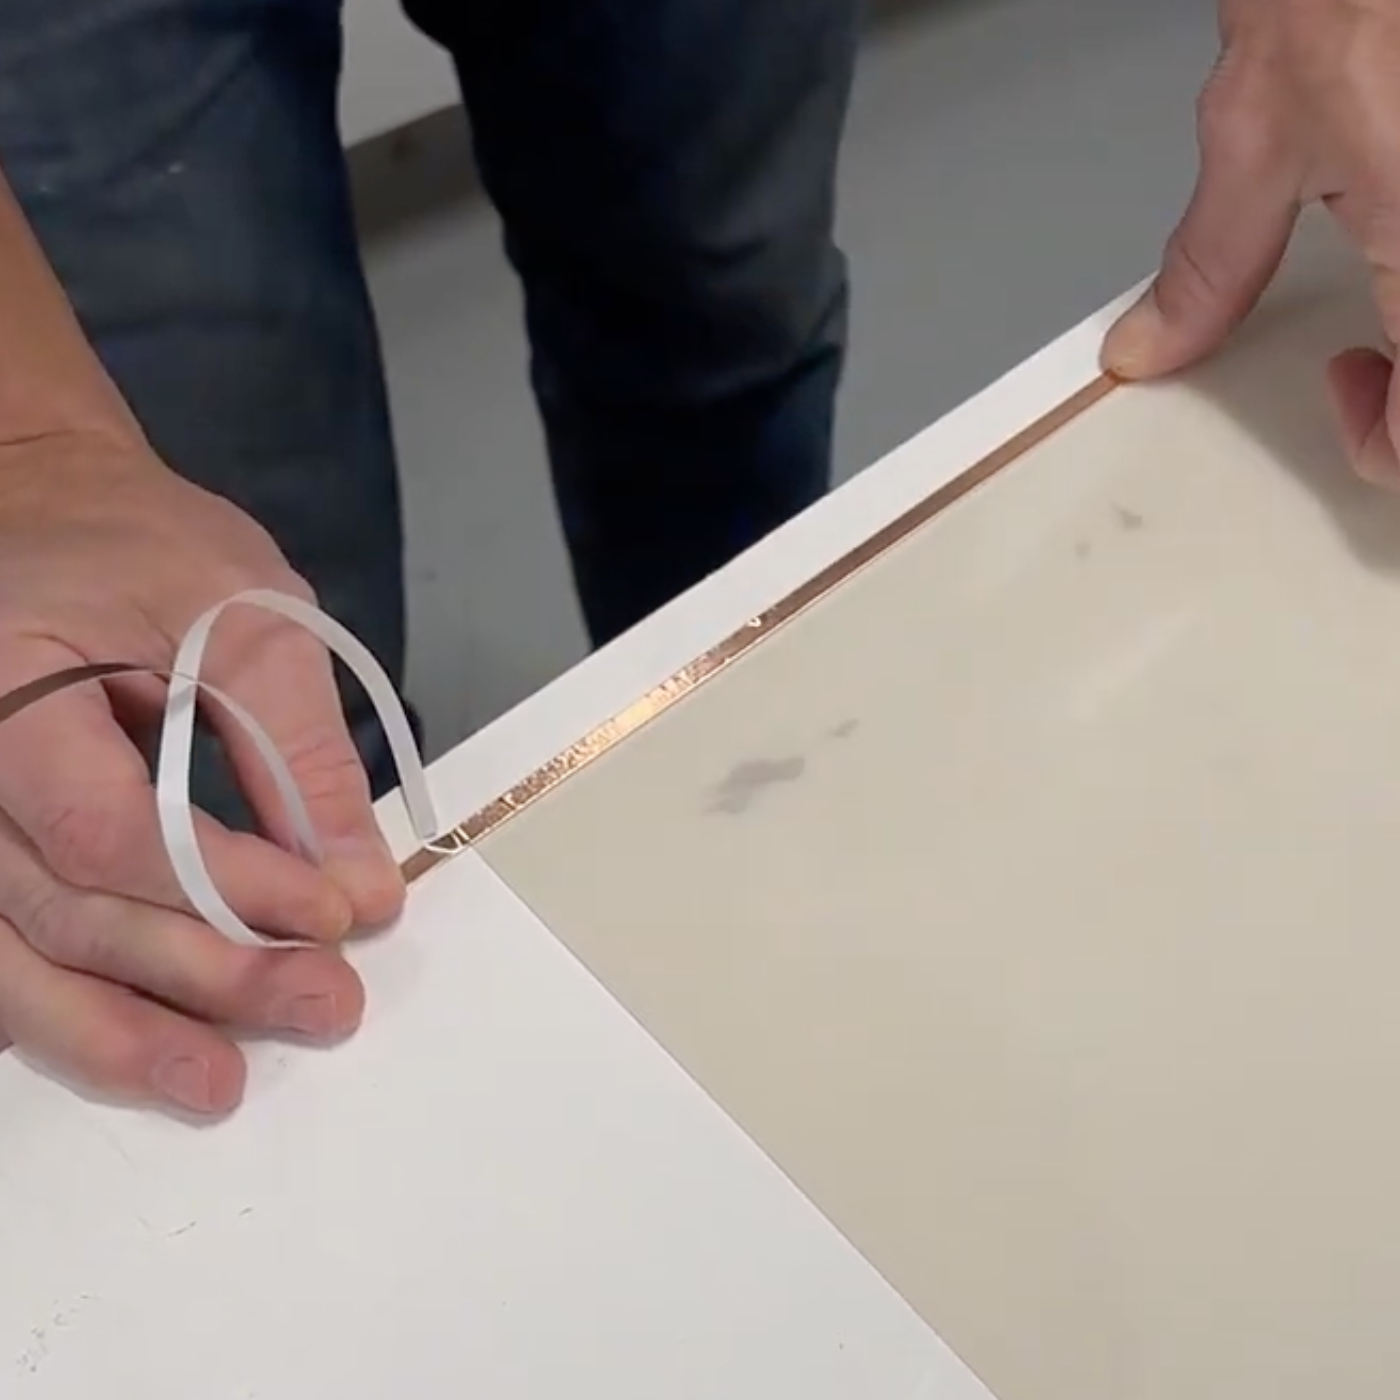
When smart film is ordered to size, Lumi Projekt can deliver the film with busbars already prepared (and of course tested).
Final installation
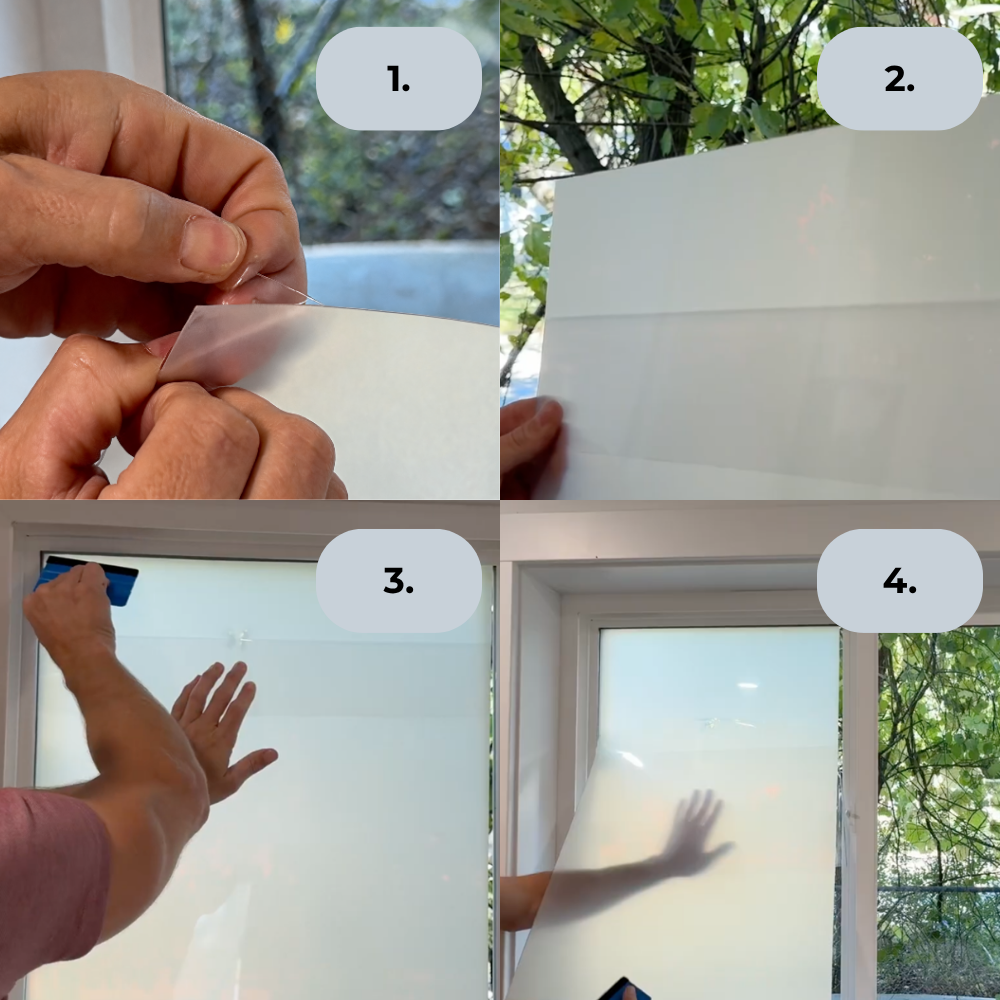
Once the smart film has been prepared and tested, it can be applied to the glass surface. The installation itself is not complicated, but it is important to keep the work area clean and apply the film carefully onto the glass.
Control

Home Assistant

Apple HomeKit

SmartThings
Remote

Wall switch
Smart film can be controlled in almost any way you want. By far the most popular options are connecting to smart home systems and control via a mobile app. The power supply also comes with a matching remote control, and an electrician can also wire control to a wall switch.
Power supply table
Choosing a power supply model — that is, how many watts [W] you need — depends on the total film area connected to the same supply. As a general rule, every 1 m² needs 5 W of power to ensure optimal performance.
In the table below you can check which models are available:
| Model | Covered area | Price incl. VAT |
|---|---|---|
| 20W | 4 m² | €29.99 |
| 30W | 6 m² | €44.99 |
| 50W | 10 m² | €54.99 |
| 100W | 20 m² | €69.99 |
| 200W | 40 m² | €119.99 |
| 300W | 60 m² | €124.99 |
Need more information?
Contact our team for a free consultation, technical specifications and a tailored quote for your project.
Contact us